Generating a Payment Link
Payment links are generated from the customer's invoice header. Once the link is generated, you can copy it to the clipboard and then paste it into an email, a text field, or document. The link contains the URL of your Click to Pay page and an authentication token that automatically loads the customer's invoice number and amount owing.
Before you can generate a payment link, you need to configure Click to Pay.
To Generate a Payment Link
-
Navigate to the Invoice Header.
-
Click Payment Link.

-
In the Click to Pay Payment Link window, click Generate Link.

-
Click the Copy button to copy the link to the Clipboard.
Notes- If you want to change how long the link will remain active, enter an amount in the Expiry Days field, and then generate a new link by clicking Generate Link.
- If you want the customer to pay a specific amount, click the Requested Amount checkbox, and enter the amount that you want the customer to pay. On the payment portal, the customer will not be able to change the payment amount when entering their payment information. To use this option, the EPASS User needs the Click to Pay - Allow Requested Amount security option.
- When a link is generated, EPASS adds a note to the Invoice Notepad that includes the user account of the person who generated the link.
-
Close the Invoice. You can now paste the payment link into an email or text message.
warningMake sure to close the invoice before sending the payment link to the customer. If the customer submits payment through Click to Pay while the invoice is open, payment will not appear on the invoice until it is closed.
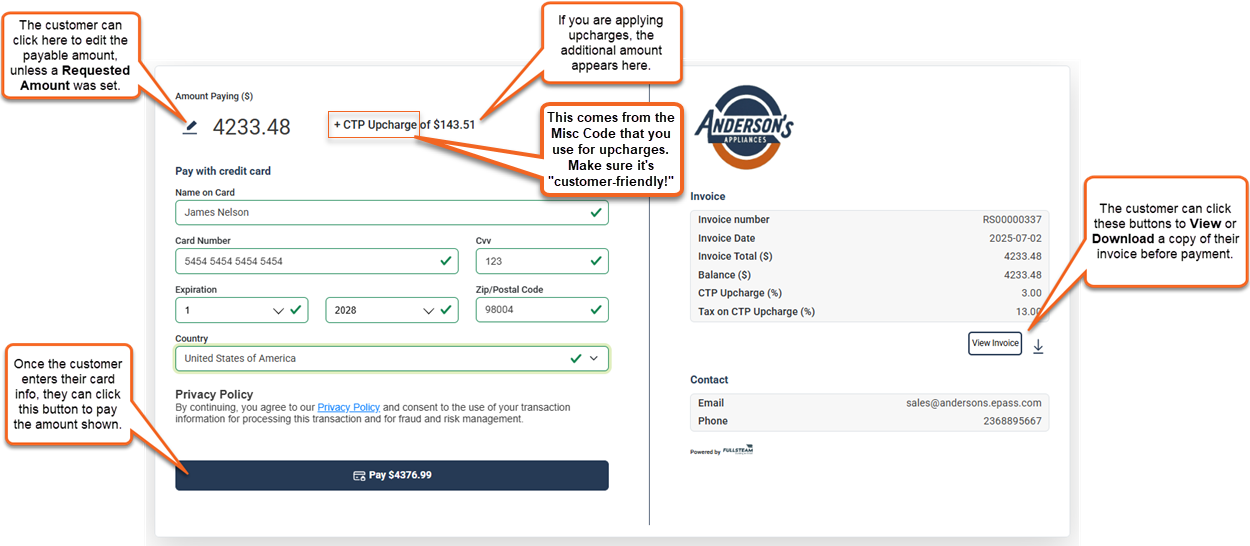
What the Customer Sees
When the customer clicks the payment link, they'll be taken to the Click to Pay web page to enter payment (actual page layout may differ slightly than shown here).
- If you've set up Click to Pay notifications for customers, they'll receive an email or text confirming receipt of their payment.
- The "Pay by Credit Card" messaging can be edited to display a custom message (for example, you might want to let your customers know which cards you accept and don't accept). EPASS Support can help you with this customization.
See Also
- Sending a Payment Link by Batch Email or Text
- Configuring Click to Pay
- Sending Text and Email Notifications to Customers
- Invoice Header
November 19, 2025